This article is a continuation of Installing a Domain Print Server (Part 1).
Before diving into the deployment options for network printers on our domain, let’s understand that normal users who are not local administrators on their computers may not be able to install our print drivers on their own. To get around this, we’ll deploy a Group Policy Object to configure Point and Print Restrictions for our domain computers.
Configure Point and Print Restrictions via GPO
To start, I’ve launched the Group Policy Management console on my domain controller, and right-clicked on Group Policy Objects. Select New.

Provide a descriptive name in the box that pops up. I’ve named mine Configure Point and Print Restrictions. Right-click on your new GPO and select Edit…

In the Group Policy editor window, browse to Computer Configuration, Policies, Administrative Templates, and click Printers. In the list of available settings locate Point and Print Restrictions. Right-click on it and select Edit.

Enable the policy. If you wish to restrict your users to only add printers from authorized print servers, check the box for Users can only point and print to these servers, then add the fully qualified domain name for your approved print servers. Configure the Security Prompts section in the When installing drivers for a new connection box by selecting Do not show warning or elevation prompt, and in the When updating drivers for an existing connection box by selecting Show warning only. Click OK to save your edits.

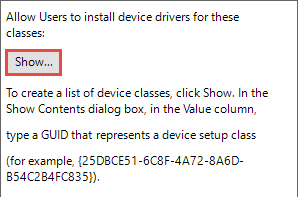
Next, while still in our new GPO, browse to Computer Configuration, Policies, Administrative Templates, System, and click Driver Installation. In the list of available settings locate Allow non-administrators to install drivers for these device setup classes. Right-click on it and select Edit. Enable the policy and click Show…
Then, paste the following string into the Value column: {4D36E979-E325-11CE-BFC1-08002BE10318}
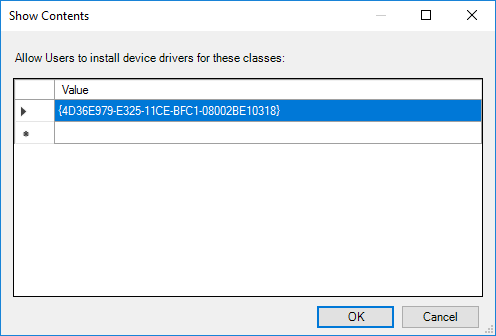
Click OK to save the value, and OK again to save your edits to this setting. This has added the printers setup class to the list of device drivers that regular users are allowed to install.
Lastly, link the new GPO to your computers OU. Now that we’ve granted the required permissions for installing drivers, let’s move on to deployment.
Configure Network Printer Deployment Options
There are two primary methods of deploying printers to your workstations via Active Directory; Deployed Printers and Group Policy Preferences.
Deployed Printers is the legacy capability which may fit the requirement in very small environments, but its limited feature set makes it a poor choice in most cases. For example, it isn’t possible to set a default printer using this feature. It is, however, extremely simple to setup.
Configure an Active Directory “Deployed Printer”
On my domain controller I’ve opened Group Policy Management and created a new GPO, linked to my Computers OU, called Deploy Printer.

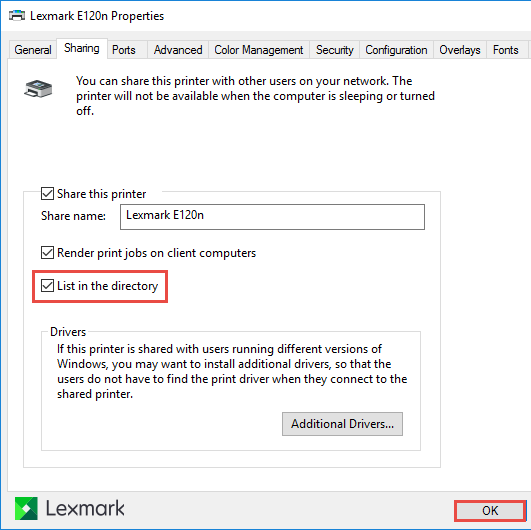
In the Deploy Printer GPO I’ve configured my printer under Computer Configuration, Policies, Windows Settings, Deployed Printers. To do that, just right-click on Deployed Printers and choose Deploy Printer. Then, type the path to the shared printer (SMB-INF1\Lexmark E120n in my case), click the Add>> button, then click OK. Close the GPO and that’s it. The configured printer will be deployed to all of the computers in the linked OU. There’s certainly more you could do with Deployed Printers, and you could probably get fancy with delegation on the new GPO to target the printer deployment a bit, but there’s really no reason to. Microsoft recommends using Group Policy Preferences to deploy printers instead, so let’s look at that.
Configure Shared Printers with Group Policy Preferences
We’ve come this far and now we have another decision to make, because Group Policy Preferences (GPP) can be set for either the User or the Computer. In larger environments it’s recommended to use a Computer policy because it processes during computer startup instead of during user logon, reducing logon time/improving user experience. If you have a lot of printers, the delay during logon can be very noticeable. One notable downside of using a computer GPP in this instance is that it’s not straightforward to set a user’s default printer. It may also be more difficult to use item-level targeting depending on how you have your computer objects organized (assuming that you have them organized).
Let’s take a look at deploying shared printer with a user GPP and some basic item-level targeting configured. To start, I’ll create a new GPO called Deploy Printers, linked to my Users OU.

Edit the settings for the new GPO and browse to User Configuration, Preferences, Control Panel Settings, Printers. Right-click on Printers and select New > Shared Printer.

In the New Shared Printer Properties box, I’m going to leave the default action of Update*. In the Share path: box, type the path to the share name of your network printer or click the ellipsis button to find it in the directory.

Click the box to Set this printer as the default printer… if desired. That’s it for the configuration on the General tab.
*One caveat to using the Update action instead of Create along with the Set this printer as the default printer option is that the user’s default printer will change back to this printer every time group policy refreshes on the machine. If the user has changed their default printer for some reason, this could be annoying. Consider using Create if you think this may be an issue in your environment.

Click the Common tab next and have a look at the available options. Select the options to Run in logged-on user’s security context, and Item-level targeting. Note that item-level targeting isn’t necessary in all scenarios. If you leave it unchecked the GPO will apply to every user account within the OU that you link the GPO to. This may be perfectly reasonable in many scenarios. Since I want to configure targeting for this demo, I’ll check the box and click the Targeting… button.

Within the Targeting Editor click the New Item drop-down list. If you’re unfamiliar with item-level targeting, you’ll notice there are a large number of parameters that you can choose to target a group policy preference against. For this demo, let’s choose Security Group. The editor populates the basic filter and asks us to define the security group that we’re going to target.

Since this is a user policy we’ll leave User in group checked, and click the ellipsis button next to the empty Group box. I previously used ADUC to create a new security group called Dept-Finance, and I’ve selected that here.

Now I can click OK to close the Targeting Editor and OK again to save the New Shared Printer settings. With the printer configured, this GPO is ready to go. The yellow triangle next to the printer name simply indicates that this is an Update action. If you selected Create instead, you'll see a green triangle.

Note that you can (and in many cases should) configure all of your printers within this one GPP GPO, using item-level targeting on each preference item to sort out who gets what. Exceptions arise when you have a large number of printers or special circumstances that require multiple GPOs. Personally, in a small environment I like to have a single GPO per site for printer deployment.
To test all of this, I’ve logged in to a different domain computer with a user account that is located within my Users container in ADUC, and is also a member of the Dept-Finance group that I assigned in item-level targeting. If you decided not to use item-level targeting, any user within the OU that your GPO is linked to should receive the printer mapping.
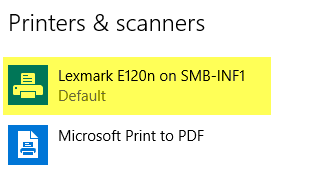
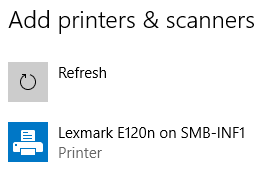
Here I can see that the printer has successfully mapped to my end-user account, and has also set as the default printer as I specified in the GPP.
That concludes this two-part series on basic domain printer deployment.